Thursday, February 25, 2016

Ring Bling

I had so much fun with this month's theme for the PCAGOE challenge! The theme is Rings. For me, these were like eating a bag of chips... you can't stop at one! As a matter of fact I made 10 of them, but only 5 are ready for prime-time.


I first made one out of a solid piece of cured polymer, with inclusions, that I had cut into slices and slabs. I took one of the slabs and drilled a hole in it. Because of the inclusions that I had used in the polymer, it needed much reinforcement, and that is one of the ones on which I'm still working... 

But, I decided to use one of the slices from that piece of cured polymer for one of my rings. There are iridescent inclusions in this polymer, and the way it was mixed left some funky holes and swirls in the natural form. I made a ring shank out of a blend of translucent & 14k gold Premo in a triune type shape (which is actually quite comfortable to wear), and attached the inclusion slice to the shank with bonding agent. Unfortunately, because it was a rainy day here and my sunlight was limited, the photos are not the best. But if you click on the individual photo, you'll see a larger size of the image, where you can view the wonderful swirls and holes that happened with this inclusion technique. My gears are spinning with the cool result of this inclusion technique. Here's the result:


When I knew that the first idea (of the cured slab ring) was going to take more time and patience, I decided that I wanted to make some gems out of polymer, which I would "set" in a polymer ring setting. I then got the idea to use wire to secure the gem. The first iteration of this was this faux opal bead (made with Premo's opal clay) that I set in a polymer ring setting (again on a triune shaped shank) and secured with wire which makes a decorative pattern:


The second iteration skipped the polymer gem and used a faceted acrylic button, again nesting on a polymer setting and secured and bedecked with wire in the shape of a star that runs across the "gem".  The wire got a bit messy on this, I need to figure out a way to make the wire less wonky, perhaps this will entail using a thicker gauge wire... This one is on a super comfy hexagon shaped ring shank, which I embedded with a strand of the wire:


The third iteration of this idea saw me hand cutting/sanding a faceted a polymer gem, which was then set in between a simple textured band of polymer using wire that also adds a decorative element. I think this may be my favorite of this grouping of rings:


The final ring came together quite quickly, as I had a one-off button that I had made in a lovely shade of robin's egg blue. I embedded some wire in the hexagonal ring shank and had the two ends coming out at the point to secure the button. I twisted the wire down next to the button and added a decorative focal to cover it up. I also antiqued the nooks and crannies with some gold acrylic paint and some burnt sienna in the center. I love this one just for it's colors and design simplicity:


I'm thinking that the last 2 will become part of my collection... I like the others a lot, but they're a little chunky for my personal style. What do you think of my funky rings? Leave me a comment and tell me which one(s) is your favorite! I'd love to hear your thoughts!

I plan to head back to the studio soon to finish up those other 5 rings that are still waiting to be finished. These are so addictive, I will likely do a whole lot more! I have another blog post coming soon too, on some fabulous items that I was lucky enough to win this past month... Look for that post after the voting reminder post for this month's challenge. Voting for this challenge opens on March 1st and will run through to March 7th at midnight EST. As usual, I'll post a reminder here when voting is open!

Saturday, February 6, 2016

February Vote - Four Seasons

Wow, time has gotten away from me again! There's only 1 and a half days left to vote for this month's challenge! Here's a peek at the fun pieces my guild members and I have created for the four seasons theme:


Please head over the the PCAGOE blog and vote for your 3 favorite entries! One randomly selected voter will be chosen to win a free prize... it could be you this month! Voting will close for this challenge at midnight EST on February 7th, so hurry over to the PCAGOE page now!

Monday, January 25, 2016

Seasons of Change

I think most people on the east coast of USA are ready for a change of season! While I am a lover of all 4 seasons, I must admit that after shoveling the nearly 3 feet of snow, that was dumped on our area this past weekend, has left me not too keen for more of the "white stuff"! I do however love being snowed-in, especially when some of that time can be spent creating... as was the case this weekend. The project that I tackled was my guild's February challenge piece, of the theme "4 seasons (spring, summer, autumn, winter)".


I kept thinking of one of my favorite songs, by singer songwriter Nicole Nordeman... called Every Season (you can listen to it here). I love the word imagery Nicole uses in her song to describe and make us sense each season; and this featured in my thoughts while creating this challenge piece. I decided that I wanted to do a series of small wall hangings that depicted the growth changes of a plant from spring to winter. When brainstorming my ideas for this, I was excited about the concept of using the background of each canvas to depict the season's weather. Spring would have raindrops, summer would have hot blazing sunbeams, fall would have a colorful sunset sky, and winter would be a frosted coating of ice.


I created the backgrounds first, and had a lot of fun doing these! I used inks, washes and paints on the polymer for the winter and summer canvases. Spring raindrops were created using liquid Fimo drops, and autumn background is a simple skinner blend of sherbet sunset colors. The plant begins it's life as an unfurling and budding shoot in spring; leafs out and flowers in summer; changes leaf color, fruits into berries and begins dropping leaves in autumn; and finally is bare branches, picked over berries and decorated with snow for winter.


I created the canvases so that they can be hung separately, I like how this separateness allows for changing up the look of them and gives the owner flexibility in how they will be displayed.


I had a lot of fun coming up with various ways to shoot them with the camera, imagining different ways in which they could be hung on the wall, or how they might be stacked upon one another in a shop while waiting to be sold.


If you didn't notice, the winter background has a treatment of inks with mica, which makes the frosted background appear different at varying angles, you can get a good idea of that effect in the following 2 photos:


I'm not sure if I like them best grouped together in a bunch, like the first photo of this blog post, or displayed in a straight line... then there's the option of vertical or horizontal... 


I'm really quite pleased with the turn-out of these pieces, there's something about each one that I love, but overall I think that the summer one is my favorite. That's somewhat amusing to me, as I'm not a summer girl... while I love all the seasons, the sultry hot and humid heat of the summer is probably my least favorite time of year. Which one of these appeals to you most, and why? Does it correspond to your personal favorite season? I'd love to hear your thoughts on this project, please leave me a comment below! Voting for this challenge will open on February 1st at the PCAGOE blog. I'll post a reminder here when the vote is open!

Sunday, January 3, 2016

Season of Giving and Making

I hope that everyone reading this blog has had a wonderful holiday season! And my best wishes to everyone for happiness, health and prosperity in 2016!

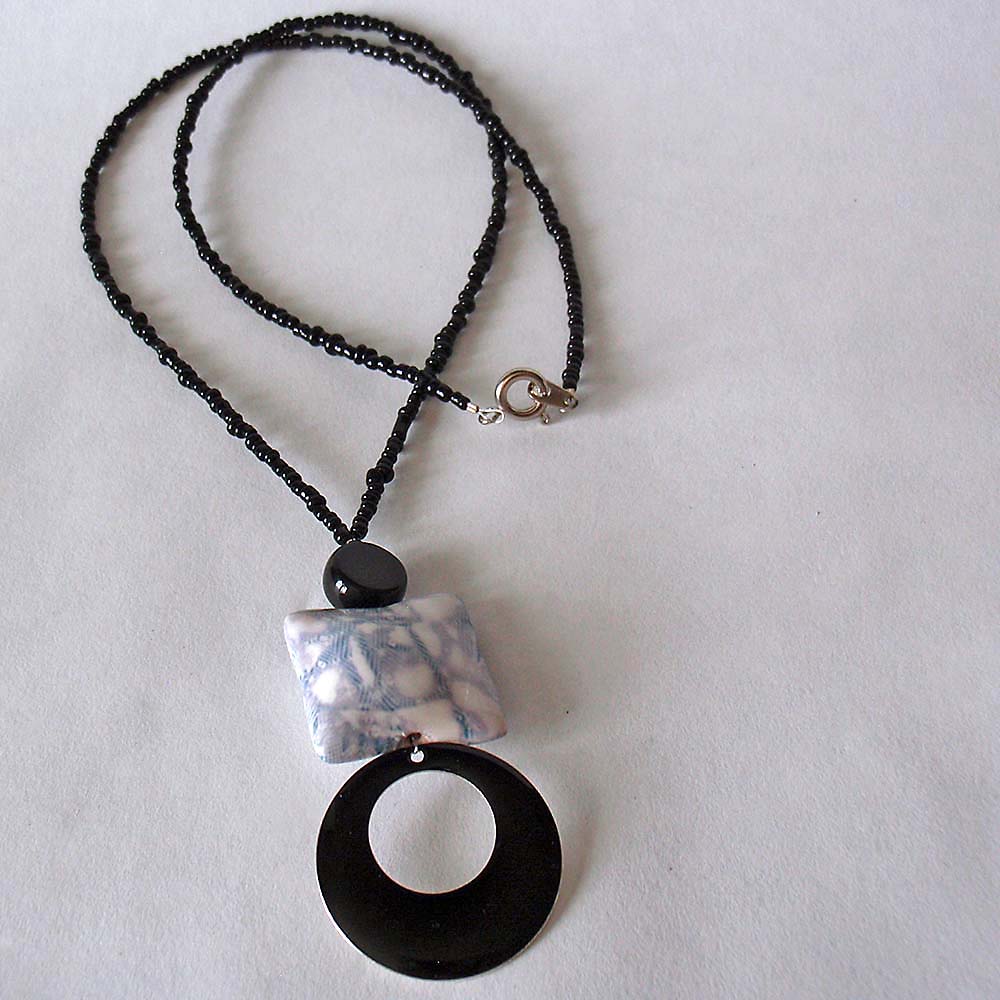
Because it was such a busy month preparing for the Christmas holiday in my home, and making gifts, I didn't get time to create a new piece for the PCAGOE January challenge. Luckily, I had an older piece that suited the theme, which is 50 Shades of Gray... no, not associated with the infamous book, but a study in value! I chose an older necklace that I had created with my silk fabric dye transfer. Here are a few shots of that piece:


 So, what was I so busy doing that I couldn't create a new piece for the challenge? Making gifts for family and friends. First on the list was a stocking that my hubby had asked me to make for him... which, at the moment, I do not have a photo. Basically it's a red stocking edged with candy striped trim, super simple.

The second project was a pair of slippers that I made for my mother-in-law. She loves these slippers that I make, and she will wear them until they have holes in the soles all the way through to her toes!  So I decided it was time she get another brand new pair. This pair is triple reinforced on the soles and upper is made of neoprene, so hopefully they will last a lot longer than her previous pairs have! Here's what they look like:

 About a week before Christmas I decided that I would make and send out origami stars, which I made out of our Land's End holiday catalogs, to my family and some friends. I generally skip sending Christmas cards because of the thousands of trees that are destroyed to make all of the paper for them. But my traditionalist hubby grumbles every year that I send out a Christmas email in lieu of Christmas cards. So this year I decided to compromise with the origami stars, getting the last minute idea to upcycle my holiday catalogs, which was an added bonus! I made about 70 (give or take a few) stars. And here's a sampling of what those looked like:


Last, but not least came the polymer gifts. I needed a little gift to give to my personal trainer, who gives me the gift of her creativity twice a week, to create challenging and always varied workouts that keep me wanting to return and wishing I could work out with her daily(which is a miracle in and of itself!). And I wanted another special gift for my friend and soul sister, with whom I knew I'd be spending New Year's Eve. In addition, I wanted to create a special gift for my parents. A month beforehand, I had the foresight to start a homemade lavender essential oil, by steeping a jar full of lavender buds in carrier oils for a month long, this was the idea behind the 2 gifts that followed, for my trainer and my friend. I created for Angel, my trainer, this polymer covered bottle which I then filled with my homemade lavender oil:


I created an inro necklace for my dear friend, Susan. Inros are small vessels, this one was created from a perfume sampler bottle, complete with the wand attached to the lid. After the polymer for this piece was cured, I then filled it with my homemade lavender oil:


And finally, I upcycled a chandelier light bulb into a cardinal tree ornament for my parents. My mom has always loved birds, but especially birds on her Christmas tree. As a matter of fact, her parent's always had the old-fashioned glass birds on their tree. As such, my mom has gifted her children and her siblings a glass bird ornament every year at Christmas. The glass bird she gifted me this year was this sweet owl:

Here are two of my other favorite bird ornaments that my parents have given me over the years:


These bird ornaments, with their fibrous and feathery tails, were the inspiration for the cardinal ornament that I created for my parents. He is quite large though, I'd estimate that he measures about 7" from beak to tail, and about 5" tall. I created him with the red glitter Premo accent polymer, with some black and a little bit of an orange mixture. The legs were made by covering an armature of wire with polymer and baking separately before inserting them into the body of the cardinal. And the plume of tail feathers and comb feathers was created by integrating some sheer red fabric strips into the polymer at those points. My parents both loved him. My only wish is that he were lighter in weight. The bulb was a pretty heavy glass to begin with, but then there was about 2 to 3 ounces of polymer added to him. Here he is:


I also created some polymer gifts for 3 of my PCAGOE guild mates, using my handmade texture plate from a previous PCAGOE challenge, for the the gift exchange the guild offers every year. I forgot to take my own photos of the pieces, but these are the photos my guild mates took of the pieces I made for them:


Here are the lovely gifts I received in exchange, from my talented guild mates (in order, from Linda Riopel of NKDesigns, Susan O'Neill of 11BOLDstret, and Jackie Sieben of JAE Jewelry and The Pleasant Pheasant)


So, with making all these gifts, getting my house decorated for Christmas and baking a couple batches of cookies, I did not have any time left to make my challenge piece, thus the older piece that I've entered for this month (above). For anyone who might be interested, that necklace is available in my createmyworld etsy shop here
Whew! That was quite a lot to post about! What do you think of all the gifting creations I made? Do you like handmade gifts to give and receive? What was your favorite handmade gift? I'd love to hear from you, leave me a comment below!

Voting is open for the January challenge, and you can cast a vote for your 3 favorite entries at the PCAGOE blog. Remember, you could win a prize! Voting closes on the 7th of January at midnight EST.