Thursday, December 6, 2012

Monochromatic Ornaments

Busy month, so not much time to post... but I wanted to share my entry for the December 2012 Polymer Clay Artists Guild of Etsy challenge.  This month's theme was monochromatic, or one hue and it's tints and shades.  My entry is a set of 3 dimensionally designed ornaments that were indeed a challenge for me to create.  I had seen the interlocking shapes idea from a wooden snowflake ornament and decided that I would try it out in polymer.  It took a while to get the proper gauge of the polymer and proper cutting, and a few days simply designing various shapes.  I think I designed about 20 different shapes which I hope to some day make, but if you know me, that may take a few years as I'm so scattered that I move right on to the next idea!  Still promising that Tiffany tutorial, just haven't had the time to get to it yet!  Any way, here are my ornaments for the challenge (this set is available in my etsy shop and more photos are on my flickr photostream:


Voting is still open, but you only have one more day!  Voting closes on Dec. 7th at midnight EST.  If you'd like to vote, please go to: http://www.polymerclayartists.blogspot.com/
If you do vote, you could be one of 3 lucky voters to win a prize!

Here are the other lovely entries, tough pick this month as they're all winners!


Saturday, November 3, 2012

Take-out Anyone?

So this month my guild's challenge theme was Asian.  My first thought on this challenge was to make a Chinese take-out box out of clay... but the logistics of working out how to hinge the sides in order for the box to be fully functional were a bit daunting... keeping with the genre of items I associate with Take-out, I struck upon the idea of covering the handles of a pair of standard bamboo chopsticks.  Wanting to do something more, I decided to also make a matching chopstick rest.  Initial idea settled, my next move was to consider the surface design of the polymer parts.  I have quite a few Asian inspired fabrics waiting to be incorporated into the perfect quilt or sewing project, so looking to my fabric collection for design inspiration was a given.  I chose a batiked fabric with Asian characters as my surface design inspiration… but I wanted to say something more than characters that mimic the fabric pattern, with meanings I could not decipher.  So, I decided to Google references and make canes of the Chinese character 吃 and the Japanese Kanji 食 for the word "Eat".  I also tried to emulate the background and colors of the fabric in the polymer surface design… and I turned a piece of the fabric into a little pouch with a matching polymer button, to complete the set for carrying the chopsticks and rest.
I'm not too experienced with making canes, this is something like my 3rd or 4th cane project ever, so this truly was a challenge for me to assemble and reduce these canes.  I was pleased with my results... what do you think??


More (larger) photos of this set can be found on my flickr and in my etsy shop.  Voting is already open for this challenge and will run through November 7th 2012 Midnight EST, so be sure to head over to the PCAGOE blog and cast your vote for your favorite 3 entries.  Three lucky voters will win their choice of prize... you could be one of them, but you have to vote to be entered!  Here's a peek at all of the fabulous entries that were created this month:


Aren't they all GREAT?!?  Please take a minute to go vote at the link listed above!

Thursday, September 6, 2012

Another Challenge and a Free "Rusted Metal" Polymer Clay Tutorial

I've been asked about the "how to" on my RUSTic Knot pendant which I created for the September PCAGOE Metallic themed challenge.  When pondering the challenge theme, I wanted to create a "rusty aged metal" look with polymer (and some other additives). … I was pretty happy with my result:


More photos of this piece can be found 
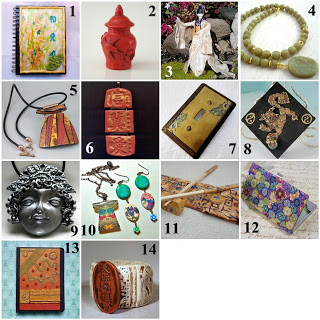
here.  Here are the other wonderful entries for this month's PCAGOE challenge.  Please go to the PCAGOE blog and vote for your 3 favorite entries before September 7th midnight EST.


Free Tutorial:
So, here's the scoop on how I created the rusty metal look(measurements are approximations)

Ingredients:
¼ bar of well conditioned transparent polymer clay
1 t. to 1 T each of paprika and chili powder
pledge Future floor finish
silver alcohol ink

Method:
Roll out the pre-conditioned clay.


Sprinkle with about ½ t. each paprika and chili powder and incorporate into the clay, keep conditioning the clay with the spice inclusions to incorporate.


Form your desired shape (adding any holes you may desire for hanging pendants, earrings, etc.) and coat the outer sides with more of the chili powder and paprika.


 Bake the clay according to the manufacturer's instructions.  Once the piece has cured and is cooled, take a razor blade or tissue blade dedicated to cutting cured clay and slice off some areas of the piece in thin layers, taking off some of the outer layer of spices.  When you do this, you are creating some smooth shiny areas and because of the spice inclusions, you will also find that small pits will form as you slice off areas, these pits will lend more to the aged look.


Then cover those areas (where you just removed some of the outer layer) with silver alcohol ink, plus cover a few of the areas where you didn't remove any outer layer, making sure that you leave plenty of "rusty" spots to achieve the look of real rusted metal…I use my fingers to smudge the ink in some areas to blend it into some of the "rusted" spots.


At this point you can even take a little water or alcohol and wipe off some areas of the silver to reveal some of the "rust" under a faint coloring of silver.  (as seen in the left hand side of the pendant in the first photo at the top of this post)  When you are happy with the look of your piece, take the whole piece and dip into a cup filled with Future floor finish to seal everything (or use a paint brush to coat with finish).


At this point I didn't want the "rusty" areas to be shiny from the sealer, so I then added more paprika to the areas I wanted to look like rust while the Future floor finish was still wet, using my fingers to bind it into place.  Adding only paprika to this stage also gives more of the rust look, as with rust, the under layers will be darker brownish color and the outer layers will have a more orange color.


Let the piece dry.  You can then add more silver alcohol ink to areas where you want the silver metal look to be stronger and more enhanced, but be sure to take a paintbrush with Future floor finish over any newly added silver ink to seal it onto the piece. Let dry thoroughly and then finish as desired.


*Note: if you dip your piece into the Future finish, you will find that flakes of the spices will fall off into the cup.  To keep these flakes from contaminating the rest of your floor finish (and not waste the whole cup), simply place a small piece of used dryer sheet over the mouth of your bottle to strain out the spice pieces as you pour the Future back into the bottle.*


Enjoy!  Any questions or comments, please don't hesitate to contact me directly or leave a comment here.  Feel free to share the link to this post with your friends, but please give credit and reference back to Create My World Designs.  And… if you use this tutorial to create something, please leave me a comment and a link to your flickr or blog with a photo of your creation so I can see your work!

Create My World Designs
©2012 text and photos

***I also want to mention; a few months ago I promised a free tutorial on how I made my Tiffany inspired faux stained glass lampshade.  I have not forgotten... I've just had an extremely busy summer in the garden in addition to a broken extruder (a tool that is essential with this project)!  I just got my new extruder and have the shade base all ready to go.  As soon as I get a bit more free time (hopefully within this month)  I will create and post that tutorial here too... thanks for your patience to anyone who has been waiting for it!

Tuesday, August 7, 2012

A Challenge for Charity... Last day to vote!

Today is the last day to vote for the August PCAGOE challenge. 
About the Challenge:  (Copied from the PCAGOE blog)
For our annual "Charity Challenge" we chose The Global Genes Project, 7000 Bracelets for Hope, which provides bracelets for the rare and genetic disease community. Bracelets needed to be blue, in keeping with the project's color theme. 
Entries for this challenge were sent directly to the organization and will not be in the artists' shops. But, if something that you see in the entries is of interest, you might contact that shop to inquire about creation of a similar item :) 
Here are the entries:
Please go to the PCAGOE blog and vote for your three favorite entries by midnight EST August 7th 2012.

And check out the Global Genes Project to read more about this great charity and how you can contribute.

It's been a crazy month of harvesting, cooking and preserving lots of veggies and fruits, but I did manage to whip up an entry for this month's challenge.  The design of this piece was inspired by the beautiful upcycled T-shirt band bracelets designed by fellow PCAGOE member Marcia Palmer.
Here is a larger image of my entry:
You can view other shots of this bracelet (and lots of my other work) on my Flickr photostream.

Tuesday, July 3, 2012

Voting time.... July 2012 PCAGOE Challenge

It's voting time again... This month's theme is Extruded Art.

About the Challenge: 
Polymer clay extruders work much like a cookie press, using metal disks to shape clay forced through the tube. Our artist-members tested their skills this month to see what they could create with extruded clay. The only rules were that the project had to incorporate extruded clay and be at least 50% polymer clay.

Here are the entries:
 Well, I've managed to enter another challenge, that makes something like 4 in a row!  That's a definite record for me!  I'm not sure I'll be able to enter the August challenge, as the veggie gardens will be rockin' then and I'll be in the throes of picking, preparing and putting up the harvest.  If I can squeeze in some time in the studio, I'll certainly try to do a challenge piece, as this next month's theme is a charity theme... I always love doing the charity challenges and really hate to miss this one.

Here's a larger photo of my entry for this month:
This piece was created while playing around with clay when "babysitting" my niece and nephew... I had an idea in my mind for the challenge and this isn't exactly what I originally intended, but my original intents usually take detours while I'm in the creative process!  My niece and nephew enjoyed playing with the clay and creating their own little pieces of art, so this piece resembles a fun and memorable evening for me.

If you haven't yet voted in the challenge, please go there now and cast your vote for your 3 favorite entries!  Go to:  http://www.polymerclayartists.blogspot.com/

Saturday, June 30, 2012

Sweet Summer Diversions


So often since my last post, I have wanted to sit down and write about what has been happening in my world.  Summer is always a crazy time during which I'm either working my tail off in the garden, on the trail in the park, or busy simply enjoying time alone with my wonderful husband.  


Since my last post I was busy picking, preparing, eating and putting up a multitude of home grown strawberries.  During peak season, I was averaging about 1 ½ gallons of strawberries every other day (I lost total count but I'd say we brought in about 40-50 quarts this year) from my two 5' by 3' strawberry beds. 


That's a lot of strawberry pies, strawberry shortcakes, strawberry smoothies, strawberries on cereal, strawberries with ice-cream, plain strawberries, strawberries dipped in Nutella and dehydrated strawberries. 


 Every year I say to myself, "Gosh I'm so lucky to have this right in my back yard…. and anyone who loves strawberries like I do, and has at least 3 square feet of growing space is crazy not to grow strawberries."  They really are so easy to grow.  I planted about 12 plants my first year (about 5 years ago), and those 12 plants multiplied each year and I now have 2 full beds… with a third and fourth bed that I dug this year and transplanted a few plants from my original bed to create bed #3 and planted a new variety (Alpine) in bed #4.  The photos in this post are from my strawberry beds and harvest this year. 


I also wanted to share this beautiful gift that I received from one of my wonderful friends.  The gift (pictured above) is a berry bowl which has drainage holes in the bottom of the bowl, perfect for rinsing a quart of berries.  I used this on a daily basis during strawberry season!  My friend Amy is a potter.  She creates functional pieces of art that would be great in any home.  Here are some of the other wonderful pieces that she has given me - a small lamp, teacup and saucer mini planter and a ring holder.


Amy does a variety of gorgeous work and she offers classes for both adults and children.  To see more of her work, check out available class schedules or make other inquiries - check her out online at:  https://www.facebook.com/pages/Amy-Burk-Pottery/210897885664992
or email her directly at:  amyburk08@yahoo.com

My other sweet summer diversions have been picking wild black raspberries in my neighborhood and blueberries from our own blueberry bushes.  This year we harvested about 2 to 3 gallons of black raspberries which I turned into raspberry syrup (perfect for making home-made sodas when mixed with plain seltzer water).  Red raspberries will be soon ready for picking and can be found in even greater abundance... and our blackberry bush is bursting with fruits that are ripening as I type this.  We will also have sunberries, huckleberries, elderberries and chokeberries this year.

I can't forget to mention my Polymer clay news.  My sweet summer polymer clay treats have been: 

1. Getting published in the Summer 2012 Recycle & Reuse issue of The Polymer Arts Magazine http://thepolymerarts.com/  for both my tutorial on silk dyed polymer and also as a mention in the article entitled Polymer to the Rescue written by Angeli Del Rosario.  Go to The Polymer Arts magazine website to order your copy or to subscribe to this awesome publication (issues are available in digital and print versions).

2. Winning 1st place voted by PCAGOE members and 2nd place by the public in the May PCAGOE monthly challenge for my Tiffany inspired lamp.  (see previous post for photos)  Thanks to everyone who voted in the challenge.

 3.  Here is a photo of the piece that I entered in the June 2012 PCAGOE challenge theme of vessels (a polymer clay covered incandescent light bulb): 


Congrats to all of the winners of the June 2012 challenge!  July challenge will be open for voting soon (I've entered a piece in this challenge also) and I'll try to post about it before the end of the voting period! 

Now to enjoy more of summer's sweet diversions!.... Leave me a comment telling me about your summer sweets....what have been the highlights of your summer?

Saturday, May 5, 2012

Challenge Inspiration Illumination

This month the PCAGOE (Polymer Clay Artist's Guild of Etsy) challenge theme is Artist Inspired.  Members were asked to choose an artist who inspires them, and create a piece of art reflecting that source. 

We are all inspired and influenced by countless sources.  This was at first a difficult task for me to choose one artist who would inspire my piece.  As the dead line approached, I had little time and little inspiration to choose one artist, as the artists who inspire me could fill volumes of books.  Then 2 days before the deadline, I had one of those "Ah Ha!" moments that determined who my artist would be…. a glance at a print that hangs in my home, coupled with the remembrance of a couple of bronze lamp bases that have been stored in my attic space… led to this:


Louis Comfort Tiffany is best known for his gorgeous stained glass works, including many cast bronze lamps with stained glass lampshades. Most people are familiar with Tiffany lampshades, to see a few of his original lampshades, google Louis Comfort Tiffany.  I have been a fan of Tiffany's work for many years, a print of his magnolia and irises hangs in my living room. A few years ago, my mother-in-law, who owns a gift shop, gave me a bunch of metal lamp bases reminiscent of the bronze lamps done by tiffany, which she didn't want to sell because they had no shades. I had always intended to try making a shade with polymer clay for these lamps, but never got around to it. This challenge gave me the push to accomplish a shade for one of the smaller lamp bases. This lamp base features the design of lily pads, so I decided to decorate the shade with lotus flowers and lily pads with a watery background.


I have received numerous questions from the polymer clay community about my process to create this lampshade.  Because there has been so much interest, I do plan to make another lampshade and document each step with photos and text, to offer a free tutorial here on my blog.  If you are interested in learning this faux stained glass polymer clay process, either sign up for my blog post notification via email or like Create My World Designs on facebook - both can be found on the right hand side of this page.  It's garden season so my hands are more in the dirt than they are in my clay (my husband and I maintain a very large organic heirloom vegetable garden plus various fruit trees, bushes and berry patches).  So, the tutorial may not appear here until next month, or even the next, but I assure you, I will do it and post it here for free, so be sure to check back!

And finally.... Here are all of the wonderful participating guild members' entries, which are inspirations themselves! 


Please go vote for your favorite 3 pieces at:  http://www.polymerclayartists.blogspot.com/
Voting closes on May 7, 2012 at 12:00 midnight EST  (so you now have 2 days from the time I post this!)  And remember, if you vote, you will automatically be entered to win a free prize!  3 random winners are chosen each month!

Please leave me a comment or questions about my lampshade.  And be sure to tell me who or what inspires you!

Monday, April 2, 2012

Vote to Win! PCAGOE April Challenge

This month's PCAGOE (Polymer Clay Artist Guild of Etsy) challenge theme is Layers.  Please go vote at the following link:  http://polymerclayartists.blogspot.com/

As you can see, there are lots of wonderful entries this month:


Layers take many forms in polymer work and for our April PCAGOE challenge, we explored lots of layering techniques from mokume gane in which a design is created by manipulated and slicing into the layers, to 3-D designs where the layers are built up from the background, and the sutton slice technique where thin layers of clay are stamped and sliced to reveal the design. (taken directly from the pcagoe blog)

My entry:  #15. Layers of Black White and Silver   has a solid black bottom layer with circle shape cut out negative space, then a layer of window screen with some liquid polymer clay drizzled in some areas of the screen, then a layer of black polymer clay with crackled silver leaf and finally a layer of white polymer clay that has been dyed with fabric.

Here's a better photo of my entry (more photos of this item can be found on etsy at: http://www.etsy.com/listing/96201379/black-white-pin-brooch-recycled-window):

Again, please vote between now and April 7th, 2012 midnight EST at http://polymerclayartists.blogspot.com/

Tuesday, March 20, 2012

Experimental work keeping me busy

Over the past couple months, I have been busy working on the development of four new polymer clay techniques.  {Hint: I've saved my favorite for last, so keep reading! ;) }  The first technique involves bonding food grade plastics to polymer clay.  A design is drawn on the clear food container plastic and it is bonded to the polymer clay.  I have much more work to do on this idea, but here is a sampling of my initial test pieces (more detailed photos can be found on my flickr photostream):

There's something about the ring that I just love (even though it is so basic and you can't really see the drawn paisley design very well, I just like the look of the raised clear plastic on the ring face), and I will be keeping that piece for myself, but plan to make others.  I have a few other favorites in here, specifically, the stained-glass-look piece, the large center piece, the small marquis shaped fish piece and the silver piece with the vines.  I'm having fun with the process and hope to have better results with the next firings.

The second idea with which I've been playing involves incorporating dyed tyvek material (upcycled from used mailing envelopes) into polymer clay.  This idea has much more experimental work needed, but here is a photo of the preliminary results of this technique:


The third project I've been working with involves "harvesting" the fine sanding bits from finishing my polymer clay pieces and incorporating it back into raw clay material.  I decided to try doing this to keep as much of the fine bits of polymer from being washed down the drain and into our water system, because I am very concerned about the environmental impacts of plastic pollution to our water ways.  Though these first beads are a bit drab, because all of the sanding bits in this batch were of many hues, which combined creates a muddy color... I have ideas for separating like hues into separate containers to keep colors more vibrant.  Here is a photo of my initial set:


Finally, (this is my favorite) I've been working on another brand new technique of transferring patterns from fabric onto polymer clay.  I'm so excited about this technique, as it is producing some great batik looks and there are so many possibilities yet to explore with this.  I will be concentrating the bulk of my work in the coming months on this technique and expect to have much more to come, but I wanted to share my favorite pieces from my first exploration.  Here are a two photos from my initial testing of this idea...


There are more photos and some different examples from all of these techniques on my flickr photostream at: http://www.flickr.com/photos/createmyworlddesigns

So, as you can see I've been very busy, and continue to be so.  I'm also in the process of writing a magazine article on the fabric transfer process.  Something I'm simply thrilled to be doing!  So, keep your eye out here for new photos and news of my ongoing experimentation... and at my etsy shop, as some of these new pieces will very soon be making their way into my shop.  And please leave me a comment either here, or on my photostream, about which pieces or which technique ideas you like best.  Thanks!